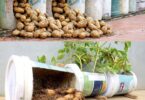
If you knew the trick, congratulations, you are smart. Anyway, growing potatoes in soil bags is a real good technique. So let’s get into it…
Growing potatoes in soil bags is a convenient and space-saving method for cultivating these versatile and beloved tubers. Whether you have limited garden space or just want to try a new way of growing potatoes, soil bags can provide an excellent solution. In this comprehensive guide, we will walk you through the steps to successfully grow potatoes in soil bags, from selecting the right materials to harvesting your crop.
Materials You’ll Need
Before you start planting your potatoes in soil bags, gather the following materials:
- Soil Bags: You can use specially designed potato grow bags or repurpose large, sturdy plastic bags. Each bag should be at least 15-20 gallons in size to accommodate the potatoes’ growth.
- Potting Mix: Choose a high-quality potting mix or create your blend of equal parts compost, garden soil, and perlite or vermiculite to ensure good drainage.
- Seed Potatoes: Purchase certified seed potatoes from a garden center or use your own, making sure they are disease-free and suitable for your region.
- Fertilizer: A balanced, slow-release granular fertilizer or organic alternatives like compost or well-rotted manure.
- Watering Can or Hose: You’ll need a way to water your soil bags consistently.
- Sunlight: Find a location that receives at least 6-8 hours of sunlight daily for optimal potato growth.
Step 1: Preparing the Soil Bags
- Start by selecting a sunny location for your soil bags. Place the bags on a well-drained surface like a patio, balcony, or garden bed. Ensure there are drainage holes in the bottom of each bag to prevent waterlogging.
- Fill the bags with your chosen potting mix, leaving about 3-4 inches of space at the top. This space will allow you to hill the soil as the potatoes grow.
Step 2: Preparing the Seed Potatoes
- Prior to planting, cut your seed potatoes into chunks with at least one or two “eyes” or buds on each piece. Each chunk should be about the size of a golf ball.
- Allow the cut pieces to air dry for a day or two, which helps prevent rotting.
Step 3: Planting Potatoes in Soil Bags
- Place the seed potato chunks on top of the potting mix in the soil bag, spacing them evenly, about 8-10 inches apart. Be sure to plant them with the eyes facing up.
- Cover the seed potatoes with a few inches of potting mix, leaving a portion of the eyes exposed.
- Water thoroughly after planting to ensure the soil is evenly moist.
Step 4: Caring for Your Potato Plants
- As the potato plants begin to grow, keep the soil consistently moist but not waterlogged. Watering deeply once or twice a week is usually sufficient, depending on the weather.
- Fertilize your potato plants with a balanced, slow-release fertilizer according to the package instructions. Alternatively, use compost or well-rotted manure to nourish your plants.
- As the potato plants grow, continue to hill up the soil around them by adding more potting mix to the bag. This encourages the development of additional tubers and prevents the potatoes from becoming exposed to sunlight, which can turn them green and bitter.
- Monitor your potato plants for pests and diseases, such as aphids, potato beetles, and late blight, and take appropriate measures to address these issues.
Step 5: Harvesting Your Potatoes
- Potato plants are typically ready for harvest when the foliage starts to yellow and die back. This usually occurs around 12-14 weeks after planting.
- Gently empty the contents of the soil bag onto a tarp or similar surface to reveal your harvested potatoes. Be careful not to damage the tubers during this process.
- Allow the harvested potatoes to dry in a cool, dark place for a few hours before storing them in a cool, dark, and well-ventilated space.
Growing potatoes in soil bags is an excellent option for gardeners with limited space or those looking to try a new method of cultivation. By following the steps outlined in this guide, you can enjoy a bountiful harvest of homegrown potatoes. From selecting the right materials to caring for your plants and finally harvesting the crop, these tips will help you successfully grow delicious, fresh potatoes in the comfort of your own home.